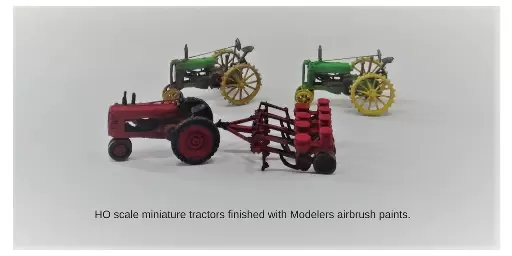
TECH TIPS FOR USING MODELERS ACRYLIC AIRBRUSH PAINT
Choosing Airbrush Features
Choosing Airbrush Features
Airbrush quality varies based on features as well as how the parts are made and assembled. Stamped parts are commonly less expensive but may not offer the same precision as costlier machined parts. Depending on your project, budget, and level of expectation, you can decide which airbrush quality makes sense for you.
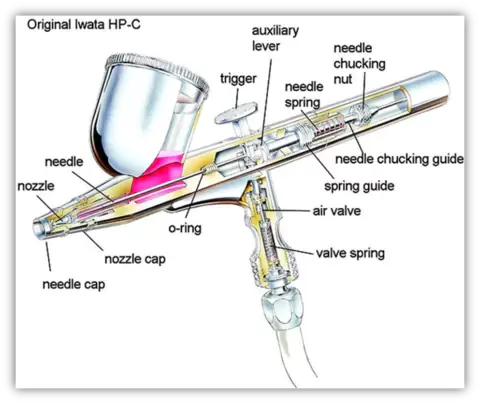
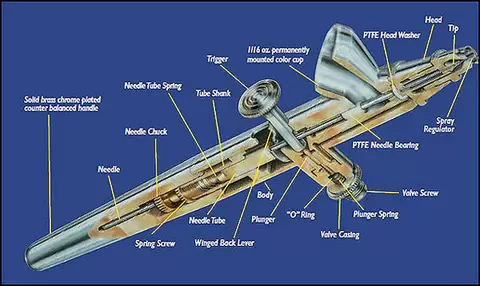
What is in an airbrush?
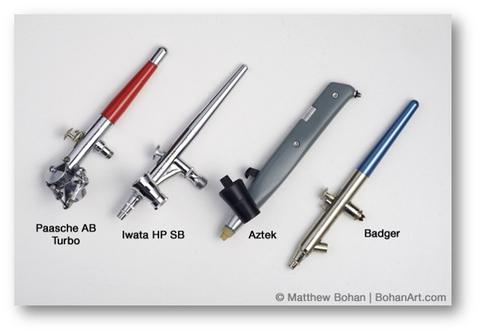
Why the cost difference between airbrushes?
Machined parts, stamped parts, manufacturing tolerances, and features.
Machined parts, stamped parts, manufacturing tolerances, and features.
Airbrush Features
Airbrush quality varies based on features as well as how the parts are made and assembled. Stamped parts are commonly less expensive but may not offer the same precision as costlier machined parts. Depending on your project, budget, and level of expectation, you can decide which airbrush quality makes sense for you.
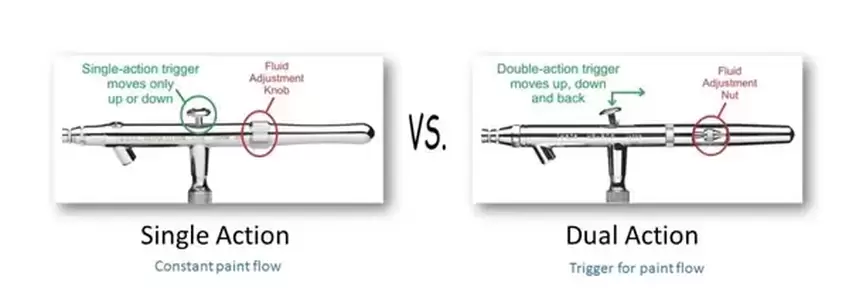
Single or Double (Dual) Action Airbrush?
Single action airbrush:
- trigger controls airflow only; paint flow is constant
- Difficult to achieve fine lines
- paint volume is adjusted by the screw at the rear of airbrush
- trigger controls both airflow and paint flow
- push down the trigger down for air flow
- pull trigger back to allow paint into mixing chamber
- amount of paint controlled by how far you the trigger is pulled back
- Needle acts as a valve which prevents paint from oozing out before the air is started
Our Opinion: For best success with acrylic paints, the dual action, or commonly called double action, airbrush is a must. With the dual action airbrush, you can easily back off on the volume of paint while maintaining the flow of air. This process allows the paint to dry and minimizes the potential for runs. Especially important when using acrylic paints which tend to dry less quickly than solvent paints.
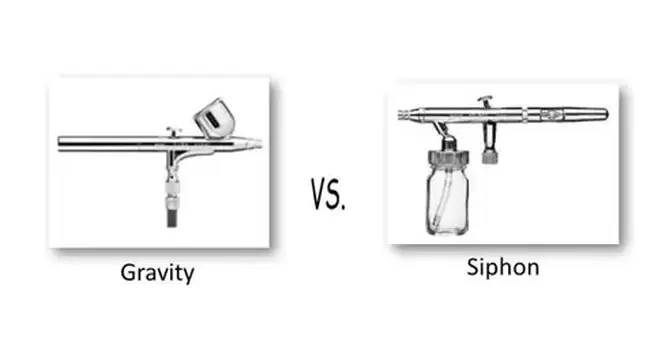
Gravity Flow vs Siphon Feed Gravity Flow Airbrush With a gravity flow airbrush, the paint cup sits on top of the airbrush, and paint-flow is accomplished by gravity.
Gravity Flow vs Siphon Feed Gravity Flow Airbrush With a gravity flow airbrush, the paint cup sits on top of the airbrush, and paint-flow is accomplished by gravity.
Siphon Feed Airbrush
The siphon feed airbrush paint bottle fits below the airbrush. Air flowing through the channel and across the tube opening pulls the paint up, creating a siphon. Because of the larger capacity of the paint bottle, siphon feed airbrushes are good for larger projects, thus requiring fewer refills.
Our Opinion: The gravity flow airbrush is ideal for painting with acrylic paints. There are minimal parts through which the paint must pass before being mixed with the air. Thus, you have fewer places for the paint to accumulate, dry, come loose, and then clog your airbrush.
A typical 7 cc cup on a gravity flow airbrush is plenty of paint to cover an HO train car.
When using acrylic paints, it is best to use a lid on your airbrush cup, minimizing evaporation and drying.
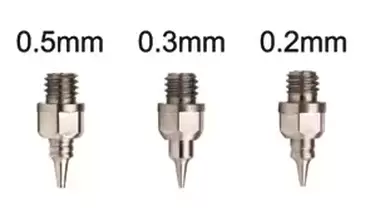
Needle/Nozzle Size
The needle/tip size on your airbrush is a matter of preference. The needle size determines how fine your airbrush will spray. As logic tells you, the smaller the needle, the finer your spray will be.
As you reduce your needle size, you should also consider the viscosity of your paint. Thinning your paint may be required.
- Small tip, 0.2 mm, for very fine work, minimizes flow of paint
- Mid-size tip, 0.3, more coverage per pass; a versatile option that you might consider for model painting
- Larger tip, 0.5, increases coverage, increases risk of paint runs
LEARN MORE: The small tip, such as a 0.2 mm, is for very fine work and minimizes the amount of paint passing through the airbrush and onto your model. The small tip is great for highlighting a model and lowers the possibility of having your paint run. On the downside, you will not be covering much area per pass thus painting an entire HO car could take about twice the time as using a 0.3 mm tip.
The 0.3 mm tip might be a good middle-size choice. Unless you plan to paint very fine lines, the 0.3 mm tip for scale models can provide the easier to handle mid-range spray.
To really speed the painting process, you might want to consider the 0.05 mm tip, but expect to be putting on quite a layer of paint per pass of the airbrush which will increase your chances of having your paint run. Not to worry, with practice, a dual action airbrush, and the forgiving nature of ModelersDP Acrylic Airbrush Paint, you will be painting like a pro in no time.
Preset Needle Stop HandleSome airbrushes have a preset needle stop. The operator sets the stop using a dial at the back of the airbrush. This option is helpful as it keeps the needle from being pulled back too far and prevents a spray that is broader than desired.
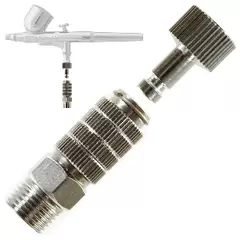
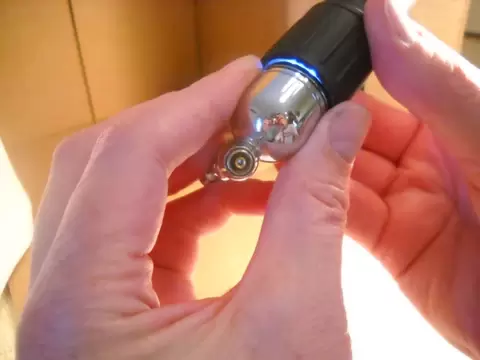
Air Supply Quick Connect/DisconnectThe airbrush quick-connect, or sometimes called quick-disconnect or quick-release, is a handy device that attaches between your airbrush and supply hose. Instead of having to unscrew the airbrush, the quick-connect releases the airbrush by simply pulling down on a ring. When the airbrush is released, the airline is closed, thus maintaining the pressure in the supply hose.
Tips for Cleaning Your Airbrush
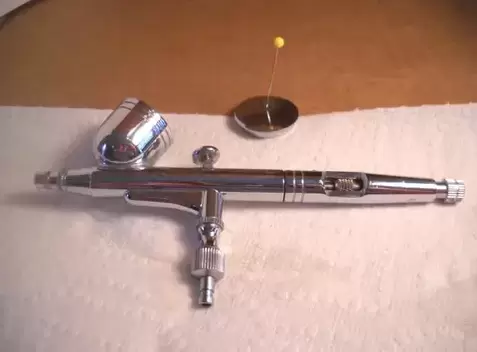
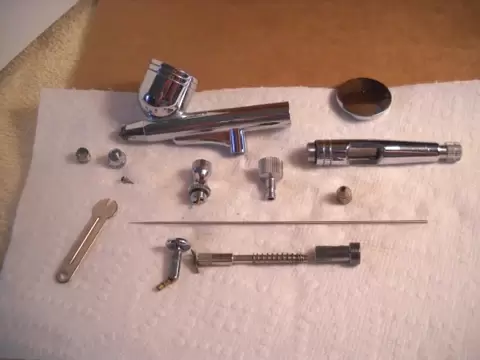
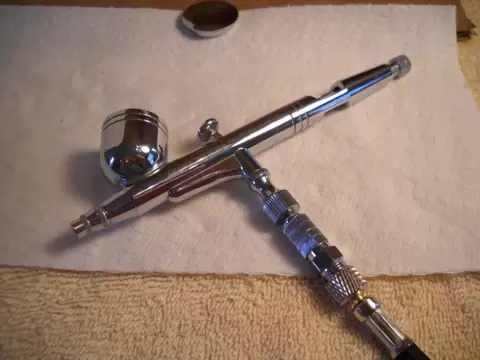
Pictured is a Masters Gravity Flow Double Action Airbrush
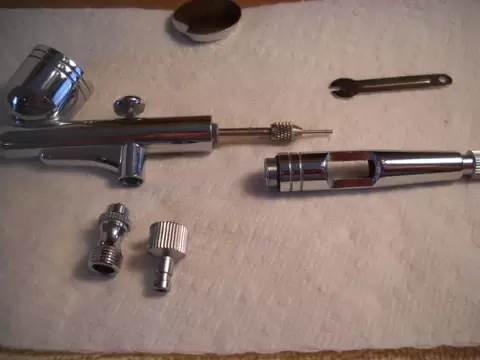
From time to time you might need to disassemble your airbrush for cleaning.
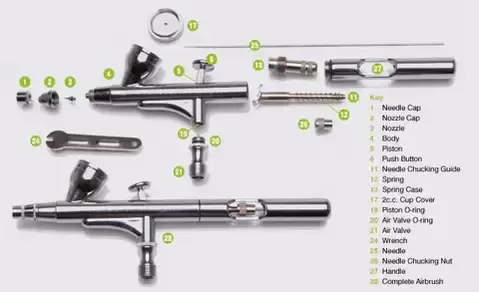
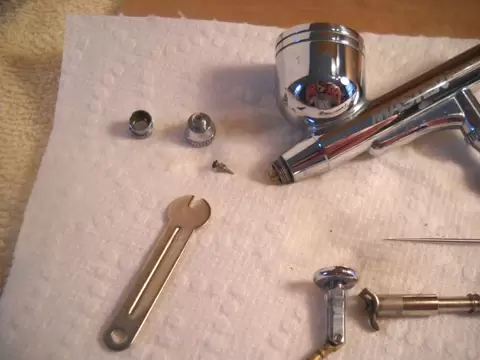
Representative Parts list for Masters Airbrush.
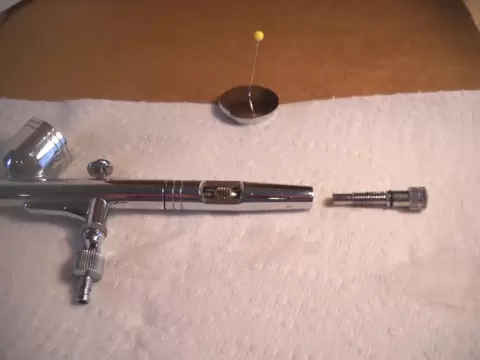
Typically the needle travel adjustment knob does not have to be removed for cleaning. When necessary, the knob can easily be removed from the handle without losing any parts.
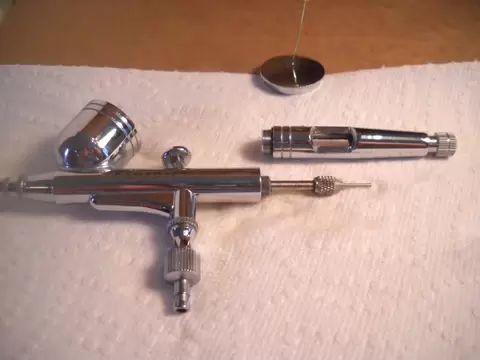
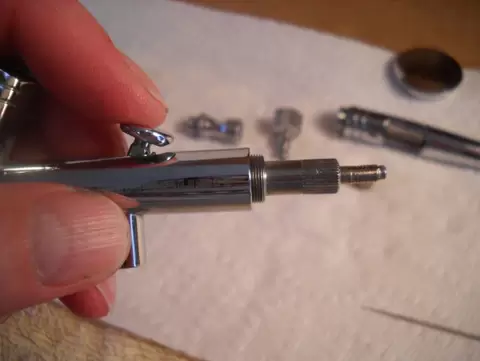
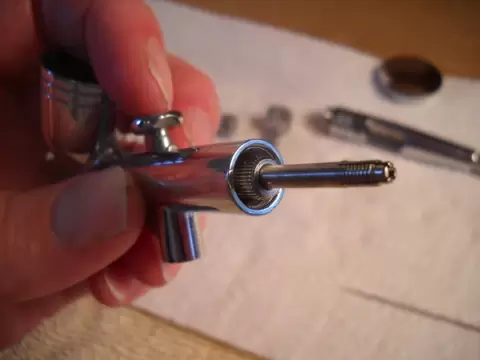
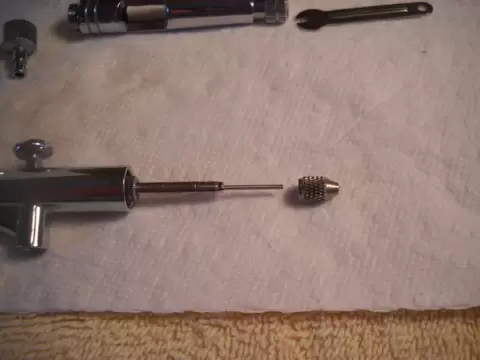
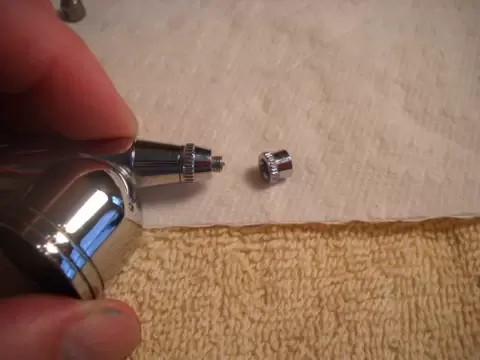
The handle is removed from the body to expose the needle chuck.
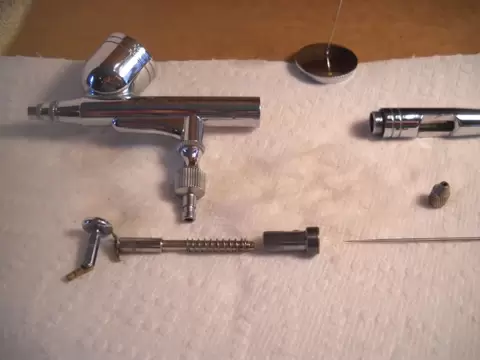
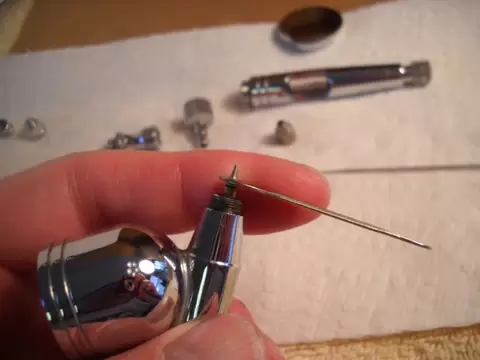
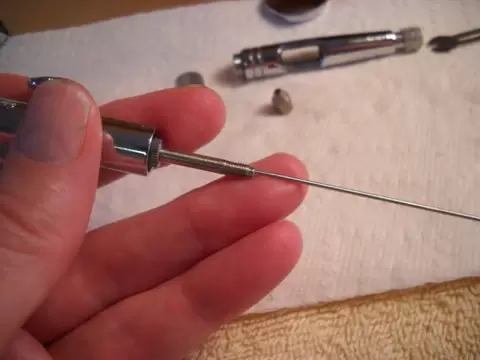
The needle chuck nut is removed and the needle slides out of the needle chuck guide and body.The needle holds the trigger from dropping out of the body. Do not be alarmed if the trigger drops out when the body of the airbrush is turned upside down.
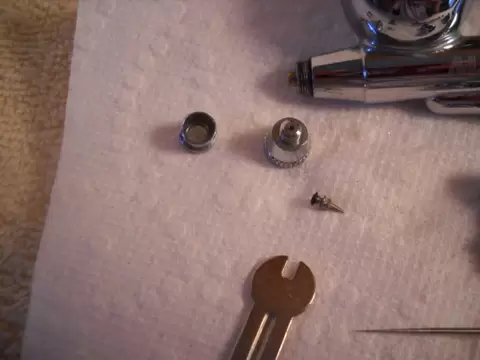
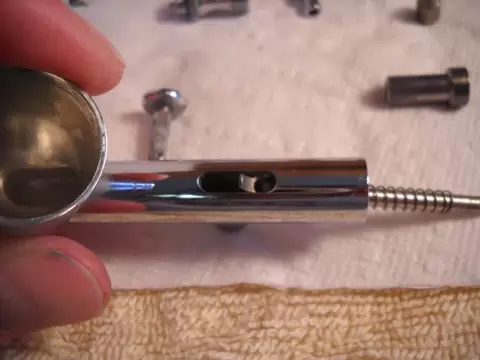
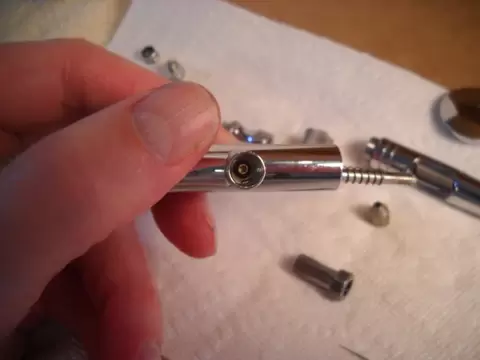
The spring case nut can be hard to locate. Only the end is protruding from the body. Remove the nut and the needle spring, needle spring guide, and the winged back lever can all be removed as a unit. Note, when installed, the winged back lever has the small end up and the small end slides along the slot behind the trigger. It the trigger has not dropped out, it can easily be removed at this point. The needle cap, nozzle cap, and nozzle are removed from the front of the body. The needle does not have to be removed first, however, by first removing the needle first, both the sharp point of the needle and the user can be protected. To remove the nozzle, the small wrench is helpful, but the wrench should always be used with the slightest amount of torque.
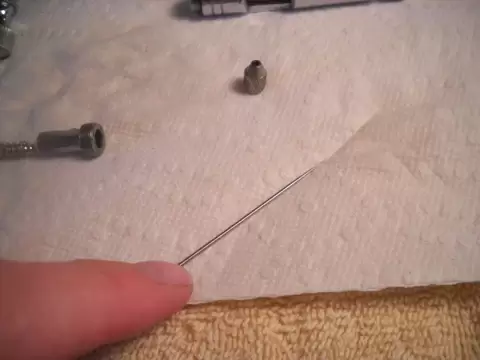
To clean the needle, drag the needle along a cloth. Different types of cleaner can be used. For acrylics, water, alcohol, or window cleaner work well. For oil paints, WD-40, lacquer thinner, carbonate cleaner all work well.
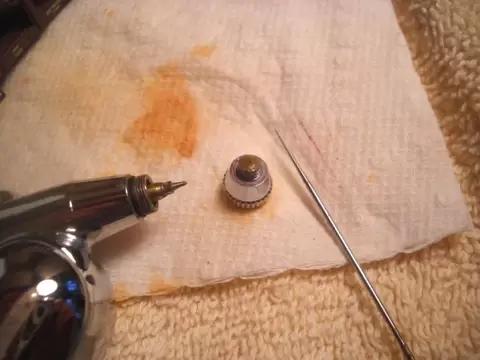
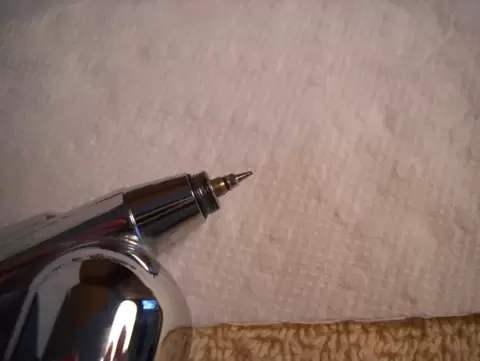
As you clean the needle and a small line of paint is left behind, you probably found the problem as to why your airbrush is not working. Also note how the nozzle cap has a buildup of paint. The buildup is common and will need cleaned from time to time. An excessive accumulation of liquid paint on the nozzle cap can cause splatters to occur. If you hang your airbrush for a few minutes, paint can also dry on the nozzle and partially block the airflow.
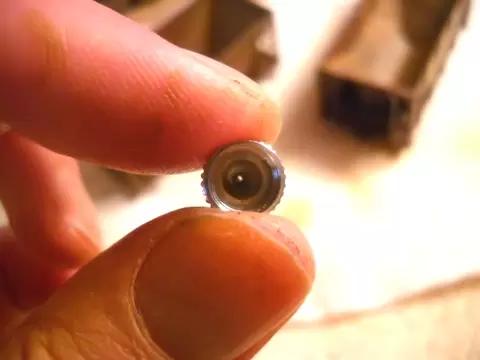
Below is a nozzle cap that is partially blocked with paint. A round pointed wood tooth pick or airbrush cleaning tool works well to clean these small orifices.
Check the nozzle for paint buildup. A small diameter wire or wire brush can be used to push out paint debris.
Check the needle seat in the body. Sometimes a light is needed. Make sure you have a nice round seat with no obstructions.
Check the needle seat in the body. Sometimes a light is needed. Make sure you have a nice round seat with no obstructions.
The cup cap has a small hole that must always be open. Any time the airbrush is laid on its side, the hole in the cup cap will most likely become clogged. Always try to hang or support the airbrush in an upright position. Again a toothpick or sharp airbrush cleaning tool works great to fix this minor problem.
Reassembly of the three nose pieces is in reverse order from which they were removed. Be careful to watch for the small O ring around the nozzle. I suggest tightening the parts only finger tight. Using your fingers will also minimize the chance of cross threading.
If you do not feel you can get the nozzle snug, only use the wrench for a 1/8 of a turn.
Slide the needle spring, needle spring guide, and the winged back lever unit into position. Then drop the trigger into position with the cylinder on the bottom of the trigger sliding into the hole on the bottom of the body.
Flip the body over to check if the cylinder of the trigger is seated within the O ring.
Start the spring case nut and slide the trigger back and forth to make sure everything is free to move as you secure the nut.
Be sure to get the nut seated finger tight into the body.
Use your finger to guide and protect the end of the needle as you slide it into the needle guide. The needle will slide through the slot in the trigger. Typically the trigger will align for receiving the needle, but just in case the trigger slot is not aligned, be gentle as to not bend the needle point.
Watch for the needle to protrude from the nozzle.
Only the slightest amount of pressure is used to slide the needle into position within the nozzle.
Retract the needle with the trigger before putting on the nozzle cap. Only finger snug with the nozzle cap.
Again, retract the needle before securing the needle cap. The needle cap is not necessary to operate the airbrush. The cap protects the needle and aids to fan out the spray. If you desire a very fine line of spray, the airbrush can be used without the cap. Time to double check that the O rings are still in place around the air valve assembly. The air valve is screwed into the body. The quick connect is then screwed onto the air valve assembly. The quick connect is not necessary, and the air supply hose can be connected directly onto the air valve assembly.
The quick connect makes disconnecting the airbrush from the air hose much easier and you can easily change out an airbrush if all your airbrushes have the quick connect.
Now that your airbrush is ready to go, let’s get back to painting.
Model Preparation
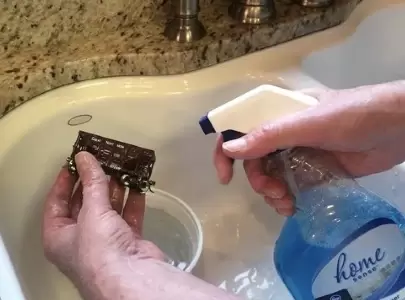
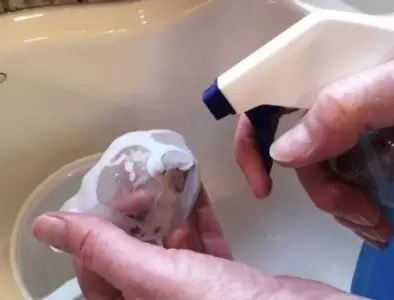
Prep your item to be painted with a quick wash of window cleaner.
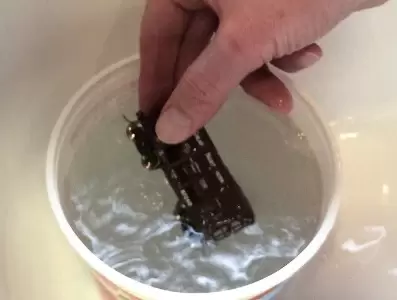
Follow the spray wash with a water rinse. Use a container to catch any pieces that might come loose.
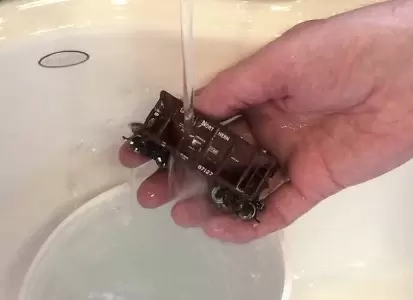
A quick rinse under the tap finishes the process of prepping. Again, try to catch the rinse water just in case a piece of the model becomes dislodged.
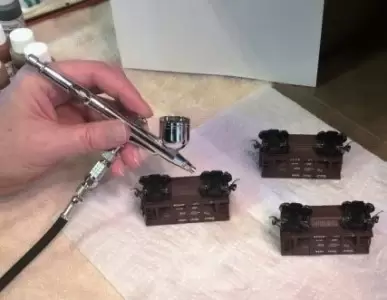
Double action airbrushes are easy to use as a blower for drying your model and blowing water out of small hidden corners.
Always test the model and prior painted surfaces for any reaction to alcohol.
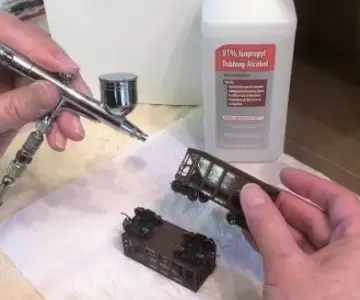
A little alcohol can be used to displace the water and shorten dry time.
Some painted models will weather nicely with an alcohol wash.
A little alcohol can be used to displace the water and shorten dry time.
Some painted models will weather nicely with an alcohol wash.
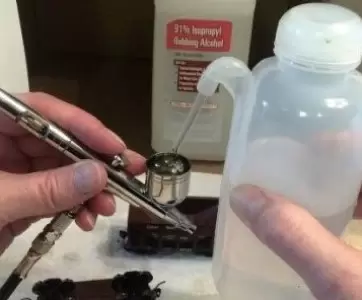
A wash bottle simplifies distribution of the alcohol.
Learn More: Model manufacturers use a releasing agent during production. The agent remains on the plastic model unless washed and will result in a poor bond when using acrylic paints. An easy solution to the problem is spraying the surface of the model to be painted with an ammonia-based window cleaner such as Windex®. Apply a little agitation by swishing the model in a bucket full of water. The bucket is recommended as it will catch any small part that might come loose and fall off the model. The bucket wash is followed by rinsing the model under tap water, but again, it is recommended to catch the water in a bucket just in case a part is dislodged.
If you are in a hurry to paint, you can use your airbrush as an air blower and gently blow the water droplets off the model. Using a little 91 percent alcohol in the airbrush cup can also aid in cleaning the surface, displacing the water droplets, and evaporating the moisture much faster than air alone. The surface should be free of visible water but does not need to be moisture free -- one big advantage to airbrushing with acrylic paints.
If you are in a hurry to paint, you can use your airbrush as an air blower and gently blow the water droplets off the model. Using a little 91 percent alcohol in the airbrush cup can also aid in cleaning the surface, displacing the water droplets, and evaporating the moisture much faster than air alone. The surface should be free of visible water but does not need to be moisture free -- one big advantage to airbrushing with acrylic paints.
To prime or not to prime is a complicated subject. This section has to do with painting metal.
Being a model railroader myself, one of our biggest challenges is painting brass models. Brass or not, many of the challenges of painting brass are applicable to other metals. Simply stated, the problem with painting brass is the oxidation that accumulates on the surface immediately after any surface preparation. The more time for oxidation, the less chance you have for adhering your paint.
A brass model will usually have a finish color and a lacquer finish. If you plan to remove the lacquer, a strong paint remover works well. For early models that do not have this finish, you will often have dark areas of the model where people have touched the brass and left oils, salt, and acids which enhanced the oxidation of the brass. We typically would just say these models were badly tarnished. Tarnish to brass is like rust to steel. To have a successful paint job for both, one has to remove all oxidation. The easiest solution is sandblast. Although this sounds difficult the equipment isn't very expensive if you already have an air compressor for painting. One can get a simple sandblasting nozzle and gun from Harbor Freight for around $20 - https://www.harborfreight.com/21-oz-hopper-gravity-feed-spot-blaster-gun-95793.html. I get my sand from Lowes or Home Depot for a couple of bucks. You'll want to sieve the cheap sand because is has some larger sized particles that can clog the sandblasting nozzle.
Now that you have exposed metal, the goal is to get the surface cleaned as quickly as possible and minimize the exposure to air. My technique is to wash the parts with window cleaner in a large pan so all the items can remain submerged until the final rinse. If you really want a superior binding paint job, the professionals add one more rinse with a chemical preparation. To prepare a metal surface for painting, one really needs to use a chemical prep. Now days with the internet, one can find all different types and for different prices. One I used in the past was a prep for aluminum which an auto body shop guy had sold me. There were two components, a wash and a rinse. The stuff worked great, and would even turn the brass a slightly pink color. I wasn't sure what the stuff was, and this in the days before MSDS information. After learning more in college, my guess, it was a weak acid and the rinse was a neutralizer. I have seen similar things now on the internet, but they all cost money. As a substitute to having to buy something special, a number of modelers recommended using vinegar. I started using vinegar and I like the cost and results. I would still get the pink tone to the brass but not to the magnitude that would appear with the commercially available chemical washes. Again, all the parts need to stay submerged until you are ready to dry and paint.
The next step is an option and depends on the size of your project. Keep in mind the oxidation starts as soon as the brass is exposed to air. That means oxidation is building all the time that the items are drying. If I have a lot of parts, I use a hair dryer and dry them the best I can. Then line them up and give them a quick coat of flat Rustoleum. I focus on the surface that will be exposed or handled. The coverage doesn't have to be complete, just a film to block the oxidation. I also do this step if the parts have multiple colors and need protected until painting the final color. There are a number of risks when spraying oil based paints from an aerosol can. You can chase a drop of moisture out from a crack that blemishes the oil painted surface, and spraying from an aerosol can can be tricky. You'll also want to wait a few days while the model bakes to completely cure the oil based paint.
However, if you have a well prepared surface without any oxidation, you can proceed to painting with Modelers Paint without the primer coat. Our paint will bond extremely well to any cleaned surface. In addition, the glues we use in the paint can be baked which will give you that same feel that the old oil based paints of Floquil and Scalecoat used to provide. One other advantage, because Modelers Paint is water based, a slight film of moisture is not a show stopper. I take my model from the wash pan, blow it off with the airbrush, and then use the double action feature of the airbrush to spray a rinse of 91% alcohol over the model. The alcohol captures any large drops of moisture, and the drops are blown away with the air from the airbrush. The process is quick and thus minimizes the time the metal is exposed to air. Once rinsed, you can begin painting and don't need to worry about moisture.
Prepare Your Paint
ModelersDP paint has been formulated with surfactants for ease in mixing. If you have primarily used solvent-based paints, you might find mixing acrylic paints will take a little more time.
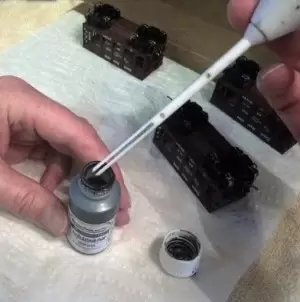
For best results, mixing with a handheld mechanical mini mixer is highly recommended to distribute the particles of paint throughout the alcohol carrier:
For best results, mixing with a handheld mechanical mini mixer is highly recommended to distribute the particles of paint throughout the alcohol carrier:
• Use the split-stick attachment and submerge the tip in the paint (our paint bottles are over-sized to allow space for mixing)
• Or snip the end off of the whip attachment, leaving prongs about 1 1/8" long, pinch together to insert into bottle
• Add a few drops of Isopropyl alcohol to paint to enhance mixing
• Move attachment around inside of paint bottle (CAUTION: Spinning the mixer too fast will result in paint flowing over the sides of the bottle.)
NOTE: Use of the mixer will result in better pigment distribution than shaking the bottle. **the handheld cordless mini mixer sold by ModelersDP is available on the website.
LEARN MORE: Acrylic paints are comprised of solid pigment particles, additives for disbursement of solids, bonding agents, and fluids used as carriers. At the molecular level, the characteristics of the fluids in acrylic water-based paint typically repel the pigments. To assist in rectifying the problem, special polymers and surface energy inhibitors are added to ModelersDP paints, making the surface of the pigments hydrophilic. Thus, once the solid particles are well mixed back into the carrier, ModelersDP acrylic paint behaves similarly to a solvent-based paint.
Strain your paint if
- you see evidence of crusting on the inside of the bottle
- paint has a layer of ‘skin’ on top
- airbrush unexpectedly clogs
- small splatter spots appear beyond normal path of airbrush spray line
- ModelersDP sells disposable filters that can be reused if cleaned after use.
- Filtering is not necessary but is recommended for that perfect paint job.
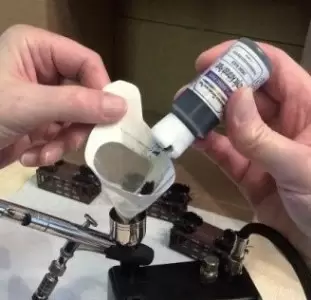
- Hold the filter over airbrush paint cup
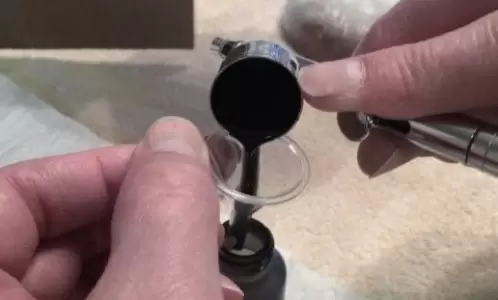
- Pour paint into the bottom of the filter
- Filtered paint will drain into airbrush cup
Turret tops make for easy and efficient pouring (available on ModelersDP website).
Filters can last a long time if cleaned with window cleaner, rinsed in water, and allowed to dry.
Filters can last a long time if cleaned with window cleaner, rinsed in water, and allowed to dry.
For great results, use ModelersDP 190-micron Disposable Paper Filters
LEARN MORE: ModelersDP paint is strained just before bottling so if you are pouring only a small amount of paint from a new bottle, you should have good results. However, after the paint sits for a while, there is a chance that the pigments would rather clump together than be suspended in the fluid carrier. Use of the Deluxe Cordless Mini Mixer, sold by ModelersDP, will easily break down these clumps, which may eliminate the need to strain your paint. Bottles of paint that have been opened, have sat for a while, have any evidence of crusting on the inside of the bottle, or are skimmed over should be strained.
While spraying, you can tell if your paint needs straining when the airbrush unexpectedly clogs or small splatter spots show up beyond the normal path of your spray line. If you are diluting ModelersDP paint for a light weathering effect on your finished model, straining is highly recommended.
Experienced professional painters who use acrylic paints strain their paint each day before use. Therefore, to minimize splattering and to get the smoothest finish possible, consider straining your paint. With ModelersDP 190-micron Disposable Paper Filters straining is a snap. Simply hold the filter over the airbrush paint cup while slowly pouring into the bottom of the filter, thus minimizing the paint coverage on the filter and loss of paint.
If paint has not been used in a while, the pigments and other materials will separate. This separation is normal but can sometimes be difficult to get blended together again. Here are suggestions for getting your paint successfully mixed.
• Use the split-stick attachment and submerge the tip in the paint (our paint bottles are over-sized to allow space for mixing)
• Or snip the end off of the whip attachment, leaving prongs about 1 1/8" long, pinch together to insert into bottle
• Add a few drops of Isopropyl alcohol to paint to enhance mixing
• Move attachment around inside of paint bottle (CAUTION: Spinning the mixer too fast will result in paint flowing over the sides of the bottle.)
Paint your model
- Just about any air pressure will work with ModelersDP acrylic airbrush paints. Pressures from 10 PSI (pounds per square inch) to 60 PSI are possible.
- Low pressures are best for very fine lines of paint
- High pressures are for atomizing the paint and increasing the rate of coverage)
- 25 PSI is a good starting point from which to experiment
- ModelersDP paint is very forgiving and a blemish or run will often smooth out as the paint dries. For a blemish or run that needs erased:
- While paint is still tacky, spray surface with an ammonia-based window cleaner
- Swish the model in a bucket full of water (this will catch any small part that might come loose)
- Follow by rinsing the model under tap water (again, use a bucket just in case a part is dislodged)
- Allow to dry; model should be free of droplets and visible water
- Optional: Use airbrush to gently blow the water droplets off the model
LEARN MORE: ModelersDP paint is very forgiving. If you do happen to have a run or you see a buildup of paint in a localize area, not to worry. With the extremely fine particles of pigment and fluid dyes, ModelersDP paint will often smooth out while drying. A second application will often hide the mistake. If you have a blemish or run that needs erased, here’s another advantage of ModelersDP water-based acrylic paint. While the paint is still tacky, spray the newly painted surface with an ammonia-based window cleaner and prep the model as if you were preparing your model for the first time (See Model Preparation topic).
To apply an opaque finish to your model-
- Apply paint in light layers
- Allow surface moisture to disappear between coats
- Continue layers of paint until desired opacity is achieved
LEARN MORE: If your goal is an opaque finish it is best to apply layers of paint; this is especially true when painting plastic surfaces. A simple technique is to provide ‘tooth’ to the surface of your model by first spraying a very light coat of paint over the surface. Because the initial layer is very light, the carrier evaporates quickly leaving a slightly tacky surface. The tacky surface is created by the bonding agents in ModelersDP paint. Each sequential pass can be a little heavier until you achieve your desired opaque finish.
ModelersDP paint has been blended with binding agents that react with air once the carrier has evaporated. As the drying takes place, the particles of pigment become attracted to the plastic surface and to each other. The bonding agents minimize the chance of paint runs and results in an exceptionally smooth surface.
Because the pigments in ModelersDP paint are so fine, spraying in one location until you see the surface color change could lead to runs. The best method is to watch for sheen to appear on your model and stop your spray. The sheen evaporates quickly, and you are ready for an additional application of ModelersDP paint.
Repeat this method of light coats until you have achieved the desired opacity. When applying multiple layers of paint to create an opaque covering, you will notice the wet paint has an egg shell texture. But not to worry, ModelersDP Acrylic Airbrush Paint will dry extremely smooth.
-
- Prep your item as described in Model Preparation.
- Stir and strain paint, also described above.
- Over diluting is not a problem, your project will just take a little longer.
- For weathering, dilute paint at a ratio of 5-10 percent paint to 95-90 percent alcohol.
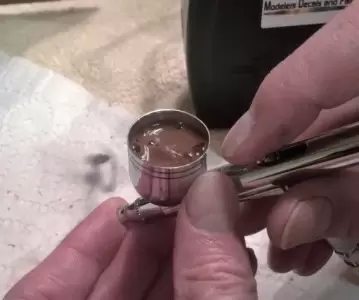
- Pour a little paint in the bottom of the airbrush bowl. Fill the remainder of the bowl with alcohol.
- Mixing the paint and alcohol is simple by using your gravity flow airbrush.
- Place your finger over the end of the airbrush, push down on the air release, and SLOWLY pull back on the trigger. CAUTION: Too much air rushing into the bowl will blow paint up and out of the bowl.
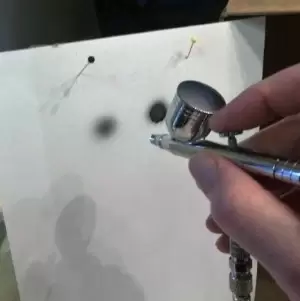
- Always test the airbrush and paint mixture before spraying directly on the model. Just a piece of paper pinned to a cardboard box/paint booth is easy, inexpensive, and practical.
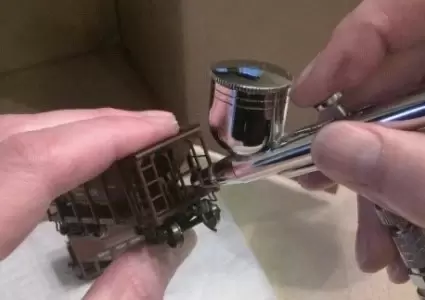
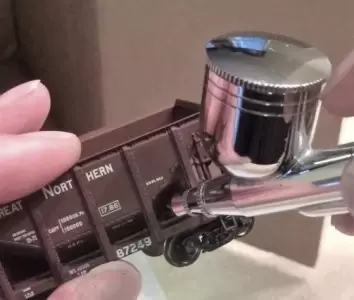
- Using low air pressure, you can get very close to the model and easily spray between the outer braces.
- Apply darker colors first, then highlight with lighter colors to accentuate the hidden details of the model.
ModelersDP Weathering Collection includes some of our favorite weathering shades.
- No need to waste your diluted paint - if you have only a small amount left in the bowl, you can easily add it back to the bottle with the aid of a small funnel.
- Purchase ModelersDP Mini Funnel in Paint Accessories
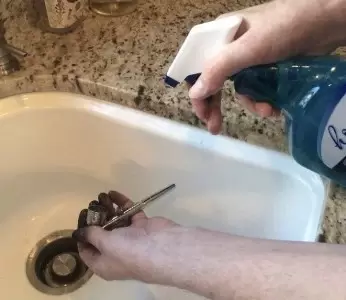
- Clean-up is quick and easy. A couple of squirts of ammonia based window cleaner followed by a tap water rinse does the trick.
- Always use a plug in the sink, just in case you drop a small part.
- Dries to the touch in about 20 minutes
- After allowing the surface to dry for 24 hours, you should be able to apply masking tapes
- Wait 2-3 days before applying decals
- Paint continues to cure over time
- For an extremely durable finish on glass or metals, bake painted object at 250°F for 24 hours
- Lightly spray airbrush cup with ammonia-based window cleaner
- Rinse the cup
- Use the window cleaner and a toothbrush to clean tip; pull needle back when cleaning tip
- Add a small amount of window cleaner to cup
- Circulate cleaner through the airbrush, under pressure (there is some discussion about whether ammonia should be used to clean the airbrush -- although we have not found it to be a problem, circulating alcohol instead is also effective).
- Follow with a rinse of tap water and/or alcohol
airbrushing miniatures
tip size
In looking over the internet, you will find a variety of options for both airbrushes and assorted tips. Typically, you’ll want a smaller tip for painting miniatures, but that is only part of the story.
For a dual (double) action airbrush, the shape of the needle and its seat in the nozzle will play a major role in how the paint is released from the airbrush.
In painting miniatures, you are looking to use low quantities of paint, to minimize the cone pattern of paint spray, and to easily control the rate at which the paint flows from the airbrush. The low quantity of paint can be achieved with a small nozzle size, say in the range of 0.2 or 0.3 millimeters.
What doesn’t get much discussion, but is very important, is how to control the cone pattern of spray and flow of paint. See the next section, Controlling the Cone Spray.
The cone spray pattern flowing from your airbrush is controlled by nozzle size, needle taper, needle and nozzle cap, air pressure, distance between the airbrush and the surface being painted, and the consistency of your paint.
The smaller the cone spray pattern, the greater chance for success when painting miniatures. See sections on Nozzle Size, Needle Taper, and Needle and Nozzle Cap.
The smaller the cone spray pattern, the greater chance for success when painting miniatures. See sections on Nozzle Size, Needle Taper, and Needle and Nozzle Cap.
Calipers can be used to measure the needle at the nozzle.
A smaller nozzle restricts the amount of paint that can be discharged from your airbrush. Although a lot of attention is given to the nozzle size, other factors can play just as important a role in successfully painting miniatures. Starting with a small nozzle tip, you can enhance your chances for success when painting miniatures.
Determining the nozzle size on your airbrush can easily be accomplished by measuring the needle with calipers.
As you reassemble your airbrush, make sure the nozzle cap is correctly sized to the nozzle. You should see a small uniform gap around the nozzle and feel a nice uniform flow of air when the trigger is pressed.
Your airbrush might have a small “O” ring to seal around the bottom of the nozzle cap. Over- tightening the nozzle cap can damage the “O” ring and allow the nozzle cap to seat down on the nozzle, thus restricting the air flow. Properly seated, the nozzle should be flush to the top of the nozzle cap or just barely extend beyond the cap.
A smaller nozzle restricts the amount of paint that can be discharged from your airbrush. Although a lot of attention is given to the nozzle size, other factors can play just as important a role in successfully painting miniatures. Starting with a small nozzle tip, you can enhance your chances for success when painting miniatures.
Determining the nozzle size on your airbrush can easily be accomplished by measuring the needle with calipers.
- Loosen the needle chuck and confirm the needle is snugly seated inside the nozzle, then re-tighten the needle chuck.
- Remove the needle and nozzle cap to expose the needle protruding from the nozzle.
- Being careful not to damage the point of the needle, slide the calipers down that portion of the needle that is exposed beyond the nozzle.
- With the calipers gently resting against the nozzle, measure the diameter of the needle. Typically, you will want to read your calipers in millimeters.
As you reassemble your airbrush, make sure the nozzle cap is correctly sized to the nozzle. You should see a small uniform gap around the nozzle and feel a nice uniform flow of air when the trigger is pressed.
Your airbrush might have a small “O” ring to seal around the bottom of the nozzle cap. Over- tightening the nozzle cap can damage the “O” ring and allow the nozzle cap to seat down on the nozzle, thus restricting the air flow. Properly seated, the nozzle should be flush to the top of the nozzle cap or just barely extend beyond the cap.
In a dual (double) action airbrush, the throw of the trigger and the needle taper will control the flow of paint from the airbrush. Greater taper to the needle will give less flow of paint and better control for painting miniatures.
Manufacturers provide airbrushes for a wide variety of uses, but in order to meet most customers’ needs, the nozzle and needle are sized to provide a typical conical spray pattern of about 1 inch in width. The standard nozzle size might range from 0.3 mm to 0.4 mm, and the taper of the needle varies among manufacturers.
For painting miniatures, needles with less taper will provide greater control of your paint flow and better control to create a small diameter cone spray.
When painting miniatures, the taper of the needle actually plays a more important role in controlling the flow of paint than the size of the nozzle. You can think of the needle and nozzle as a valve. When the needle is fully inserted into the nozzle, the flow of paint is blocked and the valve is closed. As the trigger is pulled back on a double action airbrush, the needle recedes from the nozzle and the valve begins to open. As the trigger is moved back and the needle moves away from the nozzle, needles with a greater angle of taper will allow more paint to flow than a needle with less taper.
To determine the taper of the needle, you can measure the needle diameter with calipers and determine the distance from the point of the needle to where the needle first begins to taper. With a little trigonometry and knowing the diameter and length of taper, one can determine the angle of taper. A smaller angle will result in less paint and easier control.
The nozzle cap is sized to the needle. The needle cap can be removed, which will extend the length of the stream before becoming a more conical spray pattern. The pictures below show the airbrush with the trigger engaged at quarter, half, and full pull or throw. You can see the fine line protruding from the airbrush and then the conical spray pattern begins just a few millimeters beyond the nozzle cap.
When testing an airbrush, always check that a nice flow of air is allowed to pass around the end of the nozzle. As mentioned above, the nozzle cap needs to be sized to the nozzle. An easy check is to look for a small gap between the nozzle and nozzle cap and then to test the airbrush using a little alcohol or water. Holding the airbrush next to a light source will allow one to see the airbrush in action.
Increased air pressure will move the start of the conical spray away from the nozzle and increase the quantity of paint coming from the airbrush. The high pressure creates more vacuum around the nozzle.
The greater the distance between the airbrush and the surface being painted, the greater the diameter of the conical spray.
The greater the distance between the airbrush and the surface being painted, the greater the diameter of the conical spray.
Thinned paint will allow easier flow of the paint through the nozzle, therefore the trigger doesn’t need to be pulled back as far and the jet stream will extend farther from the airbrush. Thus, a fine paint line is created farther from the airbrush.
